Bill McRoberts
bill.mcroberts@outlook.comIn-App
Xamarin.Forms Dependency Service for In-App Purchases
The challenge with cross-platform in-app purchasing (IAP) is that the transaction flows are so different across iOS and Android. In the game Linerunner 3D, I wanted a consistent interface to code against for IAP. While I was able to accomplish this, the code-base was shared code not PCL so I ended up with a lot of #defines. With Xamarin.Forms and the DependencyService we have a cleaner way of exposing platform-specific functionality exposed via a consistent API. This sample exposes platform specific IAP functionality via a single interface that can be consumed in a Xamarin.Forms PCL.

Setup
- In Visual Studio, start with a new
Blank App (Xamarin.Forms.Portable), and remove the Windows Phone platform project.
iOS
See the Xamarin In-App Purchase Basics and Configuration page for details on the following steps.
- Submit your banking and taxation information to Apple for your Apple Developer Account.
- Ensure your app has a valid App ID (not a wildcard with an asterisk * in it) and has In App Purchasing enabled in the iOS Provisioning Portal.
- Add products to your application. in iTunes Connect Application Management
Android
- In the Android platform project add the Xamarin.InAppBilling component.
- In the
AndroidManifest.xmlfile, add the<uses-permission android:name="com.android.vending.BILLING" />line between the<manifest>...</manifest>tags. - Install the Google Play Billing Library. On the Xamarin.InAppBilling Getting Started page, see the
Installing the Google Play Billing Librarysection for detailed steps. - In the Google Play Developer Console, if you have not already done so, create:
- An app that will host our IAP transactions
- A digital good to sell via IAP
- A linked Google Wallet Merchant Account
On the Xamarin.InAppBilling Getting Started page, see the
Preparing Your App for In-App Billingsection for details on the above steps.
The Interface
The interface exposes an API and set of events to consume IAP.
But wait you say, can’t we do this with a Task based API instead of hooking up events? Hang in there, that’s exactly where I want to evolve this sample in the future.
In your portable project create a Services folder and in the Service folder create an interface file IInAppService.
Add the following API to the interface:
    /// <summary>
    /// A product id we can use for testing purposes.
    /// </summary>
    string PracticeModeProductId { get; }

    /// <summary>
    /// Initializes the platform specific In-App Purchasing service.
    /// </summary>
    void Initialize();

    /// <summary>
    /// Queries your product inventory asynchronously against your
    /// platform specific In-App Purchasing service.
    /// </summary>
    void QueryInventory();

    /// <summary>
    /// Attempts to purchase a given product identified by a product id
    /// against your platform specific In-App Purchasing service.
    /// </summary>
    void PurchaseProduct(string productId);

    /// <summary>
    /// Attempts to restore products a user has already purchased.
    /// </summary>
    void RestoreProducts();

    /// <summary>
    /// For testing purposes only on Android.
    ///
    /// Allows for a convenient hook-up in your administrative ui to
    /// clear out a previous purchase.
    /// </summary>
    void RefundProduct();
Add the following events to the interface:
    /// <summary>
    /// Occurs when a query inventory transaction completes successfully
    /// against your platform specific In-App Purchasing service.
    /// </summary>
    event OnQueryInventoryDelegate OnQueryInventory;

    /// <summary>
    /// Occurs after a product has been successfully purchased with your
    /// platform specific In-App Purchasing service.
    /// </summary>
    event OnPurchaseProductDelegate OnPurchaseProduct;

    /// <summary>
    /// Occurs after a successful products restored transaction with your
    /// platform specific In-App Purchasing service.
    /// </summary>
    event OnRestoreProductsDelegate OnRestoreProducts;

    /// <summary>
    /// Occurs when there is an error querying inventory.
    /// </summary>
    event OnQueryInventoryErrorDelegate OnQueryInventoryError;

    /// <summary>
    /// Occurs when there is an error buying a product.
    /// </summary>
    event OnPurchaseProductErrorDelegate OnPurchaseProductError;

    /// <summary>
    /// Occurs when there is an error restoring products.
    /// </summary>
    event OnRestoreProductsErrorDelegate OnRestoreProductsError;

    /// <summary>
    /// Occurs when a user cancels a purchase or restore transaction.
    /// </summary>
    event OnUserCanceledDelegate OnUserCanceled;

    /// <summary>
    /// Occurs when there is an In-App Purchasing procesing error.
    /// </summary>
    event OnInAppBillingProcessingErrorDelegate OnInAppBillingProcesingError;

    /// <summary>
    /// ANDROID ONLY
    ///
    /// Raised when Google Play Services returns an invalid bundle from
    /// previously purchased items.
    /// </summary>
    event OnInvalidOwnedItemsBundleReturnedDelegate
        OnInvalidOwnedItemsBundleReturned;

    /// <summary>
    /// ANDROID ONLY
    ///
    /// Occurs when a previously purchased product fails to validate.
    /// </summary>
    event OnPurchaseFailedValidationDelegate OnPurchaseFailedValidation;
And finally add these delegates in the IInAppService file outside of the interface definition. The delegate definitions are used in the event signatures:
public delegate void OnQueryInventoryDelegate();

public delegate void OnPurchaseProductDelegate();

public delegate void OnRestoreProductsDelegate();

public delegate void OnQueryInventoryErrorDelegate(int responseCode,
    IDictionary<string, object> skuDetails);

public delegate void OnPurchaseProductErrorDelegate(int responseCode,
    string sku);

public delegate void OnRestoreProductsErrorDelegate(int responseCode,
   IDictionary<string, object> skuDetails);

public delegate void OnUserCanceledDelegate();

public delegate void OnInAppBillingProcessingErrorDelegate(string message);

public delegate void OnInvalidOwnedItemsBundleReturnedDelegate(
    IDictionary<string, object> ownedItems);

public delegate void OnPurchaseFailedValidationDelegate(
    InAppPurchase purchase, string purchaseData, string purchaseSignature);
The Implementation
I won’t be showing much code in this section - mostly pointing you to the necessary files in the GitHub repository to add to your implementation. Actual code will be exposed in the Code Walk-through section below.
- Add a
Servicesfolder to both your iOS and Android platform projects. - In the InApp GitHub Repository navigate to the
InApp/InApp.iOS/Servicesfolder and copy theInAppService.csfile to your iOSServicesfolder you just created. - In the InApp GitHub Repository navigate to the
InApp/InApp.Droid/Servicesfolder and copy theInAppService.csfile to your AndroidServicesfolder you just created.
Now add the following override to the iOS platform project’s AppDelegate class:
    public override void WillTerminate(UIApplication application)
    {
        var inAppService = App.ViewModel.TheInAppService as InAppService;
        inAppService.WillTerminate();

        base.WillTerminate(application);
    }
And add the following overrides to the Android platform project’s MainActivity class:
    protected override void OnActivityResult(int requestCode, Result resultCode, Intent data)
    {
        // Ask the in-app purchasing service connection's billing handler to process this request
        InAppService inAppService = App.ViewModel.TheInAppService as InAppService;
        inAppService.HandleActivityResult(requestCode, resultCode, data);
    }

    protected override void OnDestroy()
    {
        // Disconnect from the in-app purchasing service
        InAppService inAppService = App.ViewModel.TheInAppService as InAppService;
        inAppService.OnDestroy();

        base.OnDestroy();
    }
The Sample App
I have kept the UI and MVVM architecture as simple as possible so that the focus can be on the transaction flows for IAP.
## App
The App class couldn’t be simpler. We have one View Model for the entire app and this is exposed via the static member ViewModel.
public static InAppViewModel ViewModel;
The App constructor is responsible for instantiating the View Model and then passes the App.Properties dictionary to the View Model to restore state.
ViewModel = new InAppViewModel();
ViewModel.RestoreState(Current.Properties);
To keep this app simple we are storing purchases to App.Properties. Normally, you would store purchases to SQLite.net, but that would unnecessarily complicate this sample.
In App.OnSleep we save out the View Model’s state.
ViewModel.SaveState(Current.Properties);
Models
Our Product Model looks as follows:
public class InAppProduct
{
    /// <summary>
    /// The product ID for the product.
    /// </summary>
    public string ProductId { get; set; }

    /// <summary>
    /// Value must be “inapp” for an in-app product or "subs" for subscriptions.
    /// </summary>
    public string Type { get; set; }

    /// <summary>
    /// 	Formatted price of the item, including its currency sign. The price does not include tax.
    /// </summary>
    public string Price { get; set; }

    public string IconSource { get; set; }

    /// <summary>
    /// Price in micro-units, where 1,000,000 micro-units equal one unit of the currency.
    ///
    /// For example, if price is "€7.99", price_amount_micros is "7990000".
    /// </summary>
    public int PriceAmountMicros { get; set; }

    /// <summary>
    /// ISO 4217 currency code for price.
    ///
    /// For example, if price is specified in British pounds sterling, price_currency_code is "GBP".
    /// </summary>
    public string PriceCurrencyCode { get; set; }

    /// <summary>
    ///	Title of the product.
    /// </summary>
    public string Title { get; set; }

    /// <summary>
    /// Description of the product.
    /// </summary>
    public string Description { get; set; }
}
And our Purchase Model looks like this:
[DataContract]
public class InAppPurchase
{
    /// <summary>
    /// A unique order identifier for the transaction.
    ///
    /// This identifier corresponds to the Google payments order ID.
    /// </summary>
    public string OrderId { get; set; }

    /// <summary>
    /// Indicates whether the subscription renews automatically.
    ///
    /// If true, the subscription is active, and will automatically renew on the
    /// next billing date. If false, indicates that the user has canceled the subscription.
    /// The user has access to subscription content until the next billing date and will
    /// lose access at that time unless they re-enable automatic renewal (or manually renew,
    /// as described in Manual Renewal). If you offer a grace period, this value remains set
    /// to true for all subscriptions, as long as the grace period has not lapsed.
    /// The next billing date is extended dynamically every day until the end of the grace
    /// period or until the user fixes their payment method.
    /// </summary>
    public bool AutoRenewing { get; set; }

    /// <summary>
    ///	The application package from which the purchase originated.
    /// </summary>
    public string PackageName { get; set; }

    /// <summary>
    /// The item's product identifier.
    ///
    /// Every item has a product ID, which you must specify in the application's product list
    /// on the Google Play Developer Console.
    /// </summary>
    [DataMember]
    public string ProductId { get; set; }

    /// <summary>
    /// The time the product was purchased, in milliseconds since the epoch (Jan 1, 1970).
    /// </summary>
    public DateTime PurchaseTime { get; set; }

    /// <summary>
    /// The purchase state of the order.
    ///
    /// Possible values are 0 (purchased), 1 (canceled), or 2 (refunded).
    /// </summary>
    public int PurchaseState { get; set; }

    /// <summary>
    /// A developer-specified string that contains supplemental information about an order.
    ///
    /// You can specify a value for this field when you make a getBuyIntent request.
    /// </summary>
    public string DeveloperPayload	{get; set; }

    /// <summary>
    /// A token that uniquely identifies a purchase for a given item and user pair.
    /// </summary>
    public string PurchaseToken	{get; set; }
}
The DataContract and DataMember annotations are here for simple serialization of purchases - normally instances of these models would be serialized to SQLite.net.
ViewModel
Our View Model constructor starts off by requesting a GlobalInstance of our IInAppService from the DependencyService.
TheInAppService = DependencyService.Get<IInAppService>();
Continuing in our constructor, we then hook-up a core set of event handlers to span the life cycle of IAP purchasing and restoring.
TheInAppService.OnQueryInventory += OnQueryInventory;
TheInAppService.OnPurchaseProduct += OnPurchaseProduct;
TheInAppService.OnRestoreProducts += OnRestoreProducts;
With TheInAppService ready, call its Initialize function. We will see in the Code Walk-through section what this function does for us.
TheInAppService.Initialize();
Our purchases will be backed by an ObservableCollection in the View Model and the InAppPurchaseList class helps us when serializing and deserializing the ObservableCollection from App.Properties.
_purchases = new ObservableCollection<InAppPurchase>();
_purchaseList = new InAppPurchaseList();
A set of three simple products are built up via the helper method InitializeProducts. This is to keep the app simple. You would probably have something more elaborate here such as:
- Backed by a
SQLitetable - Built up via the response from a call to
IInAppService.QueryInventory - A web service call to your server
- Or a combination of any of the above
The View Model constructor finishes by defining three simple commands to expose Querying, Purchasing and Restoring from your IAP service. Here is the QueryInventory command:
```
QueryCommand = new Command
```
The rest of the View Model won’t be covered as it consists of mainly of helper functions and boiler-plate View Model code that are outside our focus on IAP.
Pages
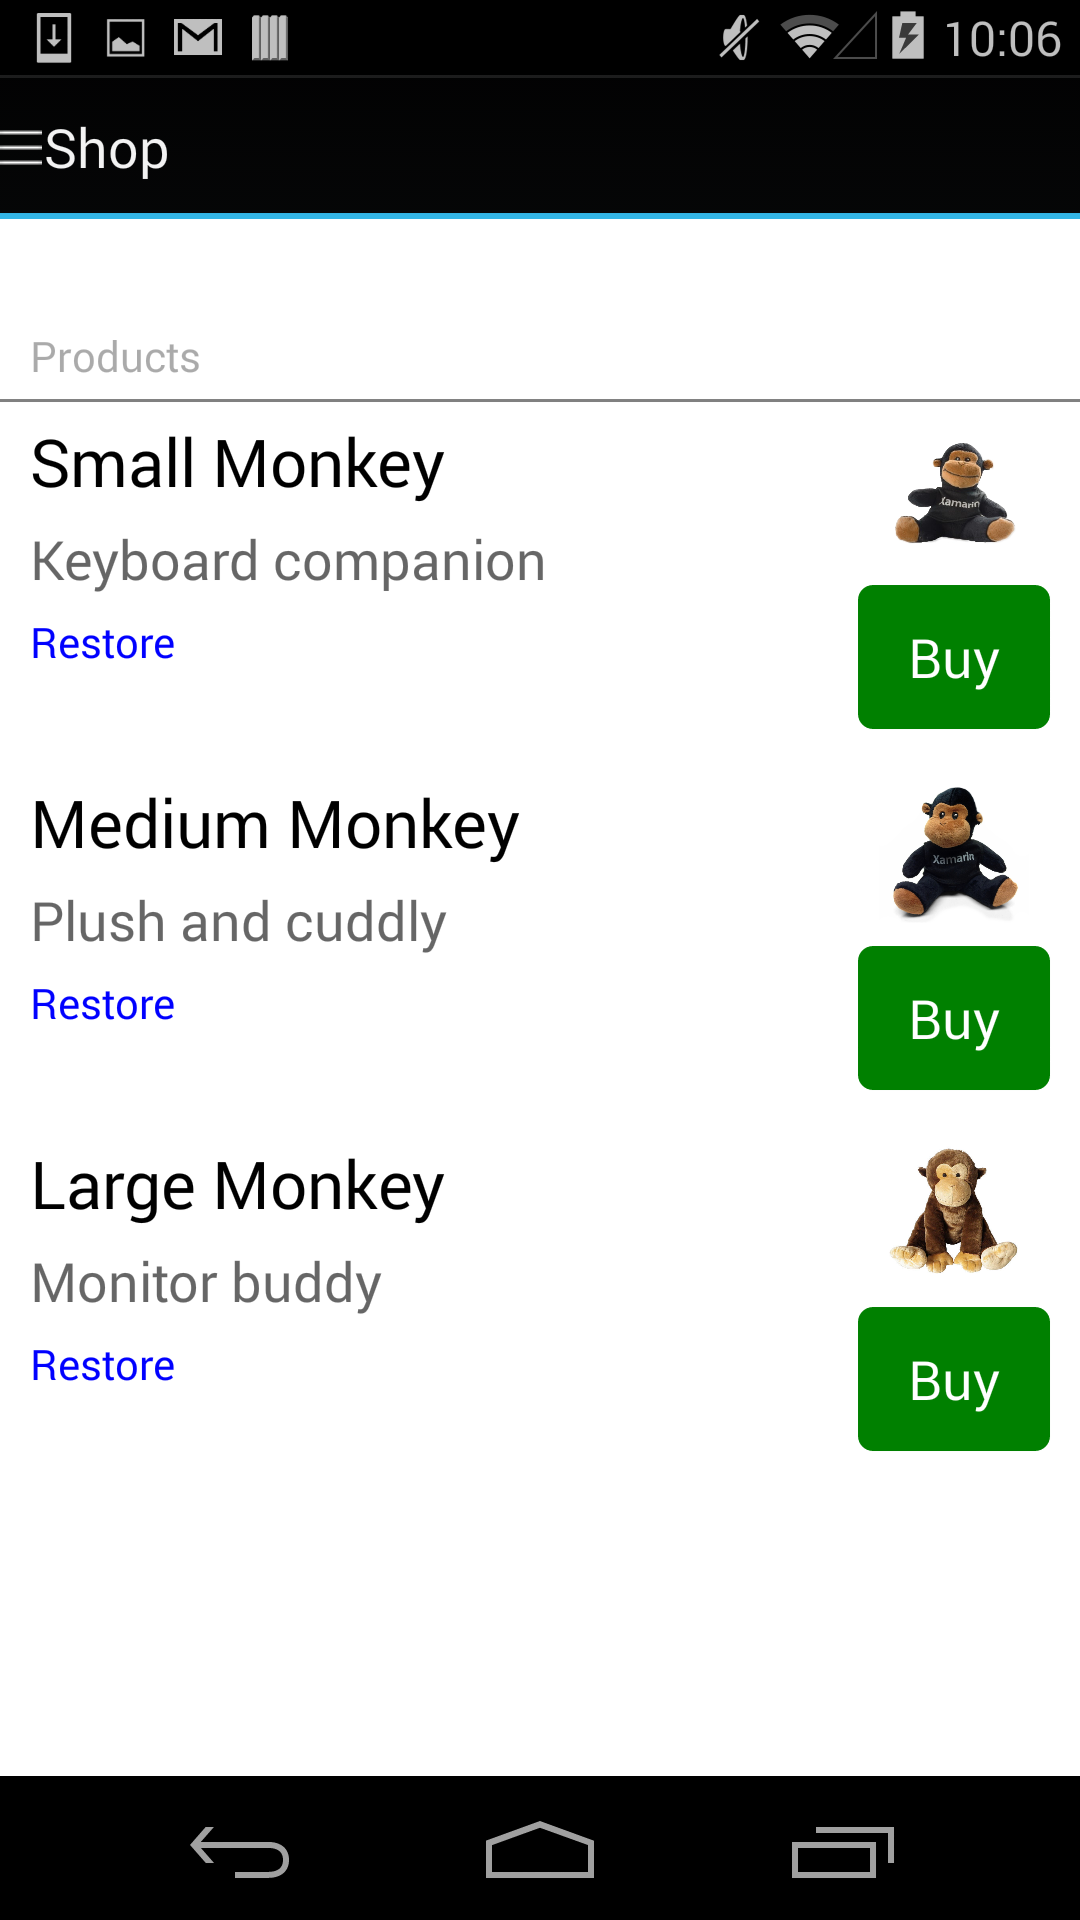
We use a MasterDetailPage to setup a simple navigation for the two pages we will be hosting in this app. See InApp.Pages.RootPage and InApp.Pages.MenuPage for the Master-Detail setup. The InApp.Pages.ShopPage presents a ListView of the products available in our app. The ViewCell for this ListView contains a Button and a Label hooked up to our View Model’s PurchaseCommand and RestoreCommand respectively. The InApp.Pages.PurchasesPage presents a ListView of the purchases we have made.
Code Walk-through
Initializing
We start with this call in the View Model’s constructor:
TheInAppService.Initialize();
iOS
We’ll pick up the flow in the iOS platform project in InApp.iOS.Services.InAppService.Initialize.
Note that all classes with the
SKprefix below are from the iOS StoreKit which you interact with to implement in-app purchasing on iOS.
We see that we first register a SKPaymentTransactionObserver with SkPaymentQueue.
        this._customPaymentObserver = new CustomPaymentObserver(this);
        SKPaymentQueue.DefaultQueue.AddTransactionObserver(this._customPaymentObserver);
We’ll see how this comes into play below, but for now note the following:
CustomPaymentObserveris a class we we implement that in turn implementsSKPaymentTransactionObserver. It’s purpose is to monitor the various states that aSKPaymentTransactioncan go through.- We pass a reference to our
InAppServiceinstance so that theCustomPaymentObservercan communicate back to our service. SKPaymentQueueis the queue that we place purchase and restore requests onto.
We then add a number of notification observers for app defined notifications with NSNotificationCenter. We will use these notifications to make sure that we finish a particular transactions on the correct thread. Below is an example of one of the notification observer setups - we will discuss the Action<NSNotification> implementations below where the context will make more sense.
this._queryInventoryObserver = NSNotificationCenter.DefaultCenter.AddObserver(InAppService.InAppQueryInventoryNotification,
(notification) =>
{
.
.
.
}
And finally, we perform an initial QueryInventory request to get our latest product information from the iOS in-app purchasing service.
        if (this.CanMakePayments())
        {
            // Async request
            // StoreKit -> App Store -> ReceivedResponse (see below)
            this.QueryInventory();
        }
Android
We’ll pick up the flow in the Android platform project in InApp.Droid.Services.InAppService.Initialize.
We first see a staging of our In-App Billing public key. You can get your key on the Google Play Developer Console. In the console, navigate to the Services & APIs tab for your app. You will find your key under the YOUR LICENSE KEY FOR THIS APPLICATION header. Divide the key into 4 sequential string parts. Then drop in the string parts into their appropriate slot in the call to Security.Unify as seen below. This will provide greater security for embedding your key into your app.
        string value = Security.Unify(
            new string[] {
                "Insert part 0",
                "Insert part 3",
                "Insert part 2",
                "Insert part 1" },
            new int[] { 0, 3, 2, 1 });
Now proceed to create a new connection to the Google Play Service using your key and a reference to your main Activity.
_serviceConnection = new InAppBillingServiceConnection(MainActivity.Instance, value);
Note, that you are not actually connecting yet - we’ll see that soon. First, hook up some event handlers for the various life-cycle events we are interested in. We hook-up the events in our
delegate implementation for InAppBillingServiceConnection.OnConnected. We show here an example of hooking up one event only as we will walk the event handling code itself in an appropriate section below where the context will make more sense.
        _serviceConnection.OnConnected += () =>
        {
            this._serviceConnection.BillingHandler.OnProductPurchased += (int response, Purchase purchase, string purchaseData, string purchaseSignature) =>
            {
            .
            .
            .
            }
        .
        .
        .
We finish the OnConnected implementation by requesting our latest product details by making a call to our own QueryInventory.
            // Load inventory or available products
            this.QueryInventory();
With all of our events hooked up, we proceed to create the actual connection to Google Play Service.
_serviceConnection.Connect();
Querying Inventory
iOS
Note first that our class InAppService extends SKProductsRequestDelegate, an abstract class where we implement the following methods:
public void ReceivedResponse (SKProductsRequest request, SKProductsResponse response)
public void RequestFailed(SKRequest request, NSError error)
With this in mind, we first see in our QueryInventory implementation the creation of an NSSet which contains the product ids we are interested in querying for:
var array = new NSString[1];
array[0] = new NSString(this.PracticeModeProductId);
NSSet productIdentifiers = NSSet.MakeNSObjectSet<NSString>(array);
We then kick off the asynchronous request:
// Set up product request for in-app purchase to be handled in
// SKProductsRequestDelegate.ReceivedResponse (see above)
this._productsRequest = new SKProductsRequest(productIdentifiers);
this._productsRequest.Delegate = this;
this._productsRequest.Start();
Picking up in ReceivedResponse, we see that we first create an NSDictionary of the SKProduct(s) we have received.
		SKProduct[] products = response.Products;

		NSDictionary userInfo = null;
		if (products.Length > 0)
        {
			NSObject[] productIdsArray = new NSObject[response.Products.Length];
			NSObject[] productsArray = new NSObject[response.Products.Length];
			for (int i = 0; i < response.Products.Length; i++) {
				productIdsArray[i] = new NSString(response.Products[i].ProductIdentifier);
				productsArray[i] = response.Products[i];
			}
			userInfo = NSDictionary.FromObjectsAndKeys (productsArray, productIdsArray);
		}
We then post our app defined notification InAppQueryInventoryNotification to the NSNotificationCenter so that we can finish the QueryInventory transaction on the correct thread:
		NSNotificationCenter.DefaultCenter.PostNotificationName(
            InAppQueryInventoryNotification,
            this,
            userInfo);
Finally, to finish out the QueryInventory transaction, we pick up in our Action<NSNotification> implementation for InAppQueryInventoryNotification which was setup in our Initialize function:
        this._queryInventoryObserver = NSNotificationCenter.DefaultCenter.AddObserver(InAppService.InAppQueryInventoryNotification,
            (notification) =>
            {
The first thing we do here is to extract out the SKProduct we packaged up in our ReceivedResponse implementation above:
                var practiceModeProductId = new NSString(this.PracticeModeProductId);
                var product = (SKProduct)info.ObjectForKey(practiceModeProductId);
At this point, you would probably want to update local storage such as SQLite.net, however here, to keep it simple, we just update the View Model directly.
                // Update inventory
                var newProduct = new InAppProduct();
                newProduct.ProductId = this.PracticeModeProductId;
                newProduct.Type = "inapp";
                newProduct.Price = this.LocalizedPrice(product);
                newProduct.PriceCurrencyCode = product.PriceLocale.CurrencyCode;
                newProduct.Title = product.LocalizedTitle;
                newProduct.Description = product.LocalizedDescription;

                App.ViewModel.Products.Add(newProduct);
Finally we notify anyone who need to know that we finished our QueryInventory transaction:
                // Notify anyone who needed to know that our inventory is in
                if (this.OnQueryInventory != null)
                {
                    this.OnQueryInventory();
                }
Android
We start by making an asynchronous request to the Xamarin.InAppBilling.InAppBillingHandler for a designated set of products we are interested in.
        var products = await this._serviceConnection.BillingHandler.QueryInventoryAsync(
                            new List<string>()
                                {
                                    this.PracticeModeProductId
                                },
                                ItemType.Product);
When the response is received, we create app specific model representations for the Xamarin.InAppBilling.Product(s) we have received and store them to the View Model. In real app, you would probably want to store them to a SQLite table.
        // Update inventory
        foreach (Product product in products)
        {
            var newProduct = new InAppProduct();
            newProduct.ProductId = product.ProductId;
            newProduct.Type = ItemType.Product;
            newProduct.Price = product.Price;
            newProduct.Title = product.Title;
            newProduct.Description = product.Description;
            newProduct.PriceCurrencyCode = product.Price_Currency_Code;

            App.ViewModel.Products.Add(newProduct);
        }
Finally, we notify anyone who is interested that the QueryInventory request has finished.
        if (this.OnQueryInventory != null)
        {
            this.OnQueryInventory();
        }
Making a Purchase
### iOS
Recall that in our Initialize function we setup our class CustomPaymentObserver to be a SKPaymentTransactionObserver on the SKPaymentQueue. With that in mind, we start in PurchaseProduct by first creating an SKPayment:
        // Construct a payment request
        var payment = SKPayment.PaymentWithProduct(productId);
We then queue the payment up in the SKPaymentQueue:
        // Queue the payment request up
        // Will be handled in:
        // CustomPaymentObserver.UpdatedTransactions -> InAppService.PurchaseTransaction - InAppService.FinishTransaction
        SKPaymentQueue.DefaultQueue.AddPayment(payment);
This asynchronous call will continue in our CustomPaymentObserver.UpdatedTransactions override:
public override void UpdatedTransactions(SKPaymentQueue queue, SKPaymentTransaction[] transactions)
    {
Here we have been called back with the status of our payment transaction. Remember that in setting up our instance of CustomPaymentObserver we passed in a reference to our InAppService instance. We’ll now follow the flow of a successful transaction. Back in UpdatedTransactions, for each transaction we received, call back into our InAppService.PurchaseTransaction function passing in the transaction itself:
        foreach (SKPaymentTransaction transaction in transactions)
        {
            switch (transaction.TransactionState)
            {
                case SKPaymentTransactionState.Purchased:
                    this._inAppService.PurchaseTransaction(transaction);
                    break;
Picking this up in InAppService.PurchaseTransaction, we see that we simplistically add the details of the purchase to a new instance of our InAppPurchase model and then add it to our View Model collection of purchases. In a real app, you would probably want to store this to a SQLite table.
        // Record the purchase
        var newPurchase = new InAppPurchase
            {
                OrderId = transaction.TransactionIdentifier,
                ProductId = transaction.Payment.ProductIdentifier,
                PurchaseTime = NSDateToDateTime(transaction.TransactionDate)
            };
        App.ViewModel.Purchases.Add(newPurchase);
Then, remove the transaction from the SKPaymentQueue:
        // Remove the transaction from the payment queue.
        // IMPORTANT: Let's ios know we're done
        SKPaymentQueue.DefaultQueue.FinishTransaction(transaction);
Then, build out and post a notification for the NotificationCenter so we can finish the transaction on the correct thread:
        // Send out a notification that we’ve finished the transaction
        using (var pool = new NSAutoreleasePool())
        {
            NSDictionary userInfo = NSDictionary.FromObjectsAndKeys(new NSObject[] { transaction }, new NSObject[] { new NSString("transaction") });
            NSNotificationCenter.DefaultCenter.PostNotificationName(InAppPurchaseProductNotification, this, userInfo);
        }
Back in Initialize, for our implementation of the product purchased notification, we see that we simple notify anyone who was interested:
        this._purchaseProductObserver = NSNotificationCenter.DefaultCenter.AddObserver(InAppService.InAppPurchaseProductNotification,
            (notification) =>
            {
                // Notify anyone who needed to know that product was purchased
                if (this.OnPurchaseProduct != null)
                {
                    this.OnPurchaseProduct();
                }

            });
Android
Restoring a Purchase
### iOS
Restoring a purchase is very similar to the transaction flow for making a purchase. We start in RestoreProducts by asking the SKPaymentQueue to restore all completed transactions:
        // theObserver will be notified of when the restored transactions start arriving <- AppStore
        SKPaymentQueue.DefaultQueue.RestoreCompletedTransactions();
Picking up in our CustomPaymentObserver.UpdatedTransactions, we see that we call back into our InAppService.RestoreTransaction function:
    public override void UpdatedTransactions(SKPaymentQueue queue, SKPaymentTransaction[] transactions)
    {
        foreach (SKPaymentTransaction transaction in transactions)
        {
            switch (transaction.TransactionState)
            {
                .
                .
                .
                case SKPaymentTransactionState.Restored:
                    this._inAppService.RestoreTransaction(transaction);
                    break;
In InAppService.RestoreTransaction, we first simplistically record the restored transaction. In a real app you would probably want to update a SQLite table:
        // Record the restore
        var newPurchase = new InAppPurchase
            {
                OrderId = transaction.OriginalTransaction.TransactionIdentifier,
                ProductId = transaction.OriginalTransaction.Payment.ProductIdentifier,
                PurchaseTime = NSDateToDateTime(transaction.OriginalTransaction.TransactionDate)
            };
        App.ViewModel.Purchases.Add(newPurchase);
We then remove the restore transaction from the SKPaymentQueue:
        // Remove the transaction from the payment queue.
        // IMPORTANT: Let's ios know we're done
        SKPaymentQueue.DefaultQueue.FinishTransaction(transaction);
And then we build an post a notification to the NSNotificationCenter:
        // Send out a notification that we’ve finished the transaction
        using (var pool = new NSAutoreleasePool())
        {
            NSDictionary userInfo = NSDictionary.FromObjectsAndKeys(new NSObject[] { transaction }, new NSObject[] { new NSString("transaction") });
            NSNotificationCenter.DefaultCenter.PostNotificationName(InAppRestoreProductsNotification, this, userInfo);
        }
Finally, back in our Initialize function we will see the handling of this notification simply notifies anyone who is interested:
                // Notify anyone who needed to know that products were restored
                if (this.OnRestoreProducts != null)
                {
                    this.OnRestoreProducts();
                }